Showing posts with label Flower Clip. Show all posts

Tuesday, May 4, 2010

Flowers Beautiful


I am going to be teaching a bunch of women how to make different types of hair accessories and here is the list that I have compiled for their information. There are so many different flower tutorials out there and I'm sure I have missed a bunch but this is a good list to start with.

On top of these wonderful sites I also LOVE Girly Things Bows. I think they have the best tutorials on making ribbon bows. They have over 30 different tutorials. It's wonderful. Check them out for sure.
The other place that I have found is Make Bows And More. Both are great resources.

Ribbon (Burlap) Flower Clip from That's So Cuegly
Flower Corsage from V and Co.

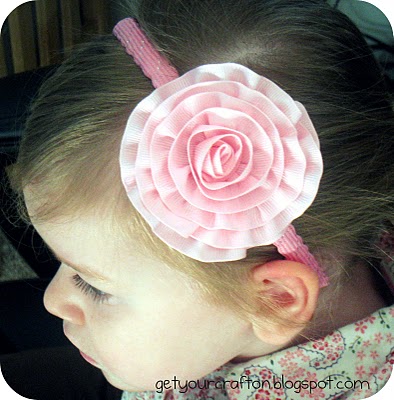
Ribbon Flower Headband from Get Your Craft On
Silk Flower Clips from Pebbles and Poppys (That's Me!!!)

Crochet Flower from Little Birdie Secrets

Rounded Petal Fabric Flower from Pink Paper Peppermints

Fabric Flower Clip from Annies Cupboard

Petite Felt Flower from Or So She Says

Silk Flower Bobbies from Refabulous

Crochet Flower Hair Clip from Floral Showers Crafts

Simple Ribbon Hair Clip from The Paper Seed

Fabric Flower Headband from Creation Corner

Dainty Flowers from Mrs. Priss

Felt Flower from A Hoot and A Holler

T-shirt Flower Headband from Crafty SchemesThis last one came from a comment and I am happy to add to my list if anyone else has a cute flower or hair accessory tutorial. Thanks!!!

A Lace Flower
from Aly & Ash


Also check out my other post with a couple more fabric flower tutorials.
Signature

Wednesday, August 19, 2009

Flower Hair Clip Tutorial

For some reason this is going to have a lot of pictures. Sorry they aren't that great either. OK, I know that there are a lot of tutorials out there on just about everything but I haven't seen anyone do a flower hair clip. So, I took it upon myself to do it for you.

1. Gather your supplies. I'm cheap so I got the flower and even the rhinestone from the dollar store. The ribbon I got in the dollar bin at Michaels. The alligator clip was in a box of 100 that I got from a beauty supply store. It was actually cheaper to buy there than it was to find them online. The rest I had on hand.
2. Measure how much ribbon you will need for your alligator clip. Cut.
3. Seal the edges with either a lighter, heat tool, or fray check. I prefer the lighter because it seals it instantly and I don't have to wait for it to dry (like fray check.) It may take some practice if you haven't done it before.
4. Glue the ribbon on to the clip. The side of the clip that is curved is going to have the ribbon wrapped around it completely. I usually start on the inside and work my way out but you can do whatever works for you.


5. Take the flower off of the stem. Then take the bottom of the flower off.6. Take the rest of the flower apart. There were three parts to the flower that I will discard. I just kept the petals in this flower.
7. Turn the flower over so that you start with the bottom layer first.
8. Here is the clip and the bottom layer upside down.
You are going to put a dab of hot glue on the clip.
Grab the bottom layer, flip it over, and press the middle onto the clip.
9. Continue with each layer till you are done.


10. Put a dab of glue on the top layer of the flower and add the rhinestone. Press firmly for a couple seconds.


11. You are done and can now add it to your daughter's hair. (My daughter was being a little silly here.)

Option #1 - I found a couple flowers like this one already put together. All I had to do was line the alligator clip and then put some glue on it and press the whole flower onto that clip. The easiest flower clip I ever did. If there were more decorative brads out there the flowers would be so easy to make. (Well, at least easier.)


Option #2 - If you want to keep the center of the flower like this one here all you have to do is take the bottom off and cut the plastic piece hanging out. Then you glue the the whole flower to the clip. Sometimes the plastic piece doesn't catch and you may have to glue again at the next layer.

Option #3 - I found some really cute buttons for the green Gerber Daisy. I was always trying to figure out how to use them when my mom came up with the idea of grinding the back of the button off. So, that's what I did. I had my dad grind off the back and it was perfect for the flower center.

Warning - If you are going to grind down the button be sure to not grind the silver coating at the very bottom because that's what makes the rhinestone shimmer. I got some buttons and it was ground off too much and you could see a square hole in the middle of the rhinestone. Be careful.

Here are all the flowers I have done so far. The blinds have been great in holding them for me.
Blog Widget by LinkWithin

Website Visitor Tracking